The Complete Shoe Care Guide Part 2
So you’ve purchased some really nice shoes. Congratulations! Now what are you going to do to take care of those beauties? Well, you can start by reading our Complete Shoe Care Guide! We’ve asked shoe care expert and owner of Pure Polish Products Andy Vaughn to walk us through the steps that will ensure your favorite footwear lasts for years! In Part 1, we covered the equipment and products you’ll need to build your shoe care kit and how to spot the areas that need the most love. Now Part 2 takes us through the cleaning, conditioning and polishing process in-depth.
Selecting a Color
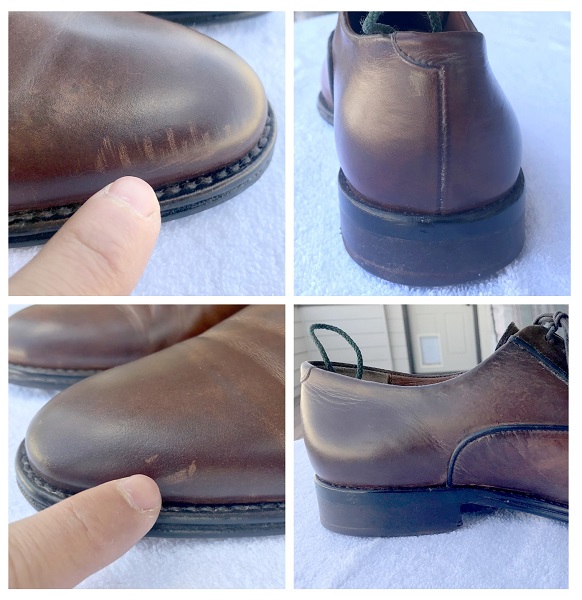
First we want to select the proper color for polishing these shoes. If you don’t need to restore any color, you can always go with a neutral cream that has no pigment. But we have some scuffs on the toes and heels of these ones. So it would be good to restore a consistently natural color throughout the shoe.
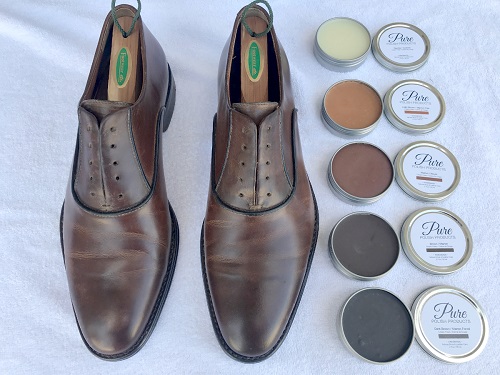
I chose Brown Cream Polish for this, although I could have also gone with Walnut. But the darker color will also cover up some of the creasing along the vamp, while the conditioning oil brings back the leather’s elasticity.
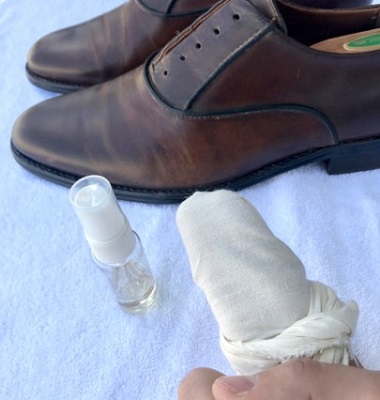
Step 1 – Surface Cleaning
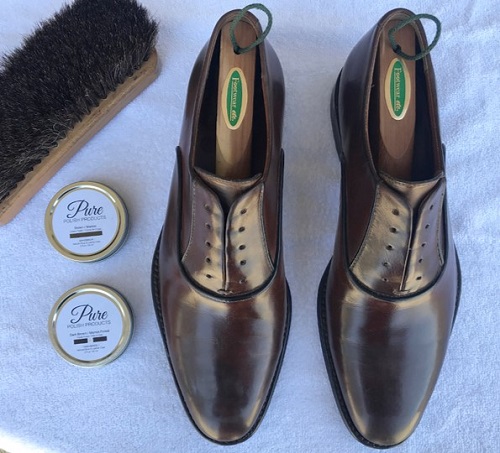
This step requires a short horse hair brush (or boar’s hair), a clean cotton cloth, and a water spritzer.
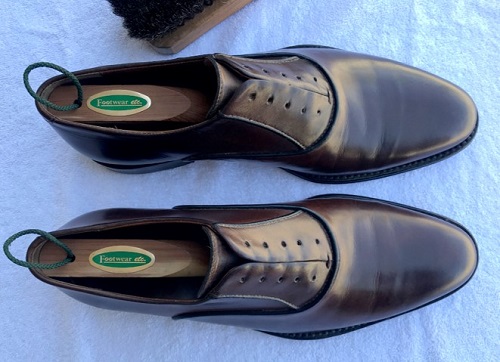
First, we remove the laces from the shoes to give full access to the leather.
Second, we give the shoes a brisk brushing to clean off any remaining dust, dirt, or grime off the surface of the leather.
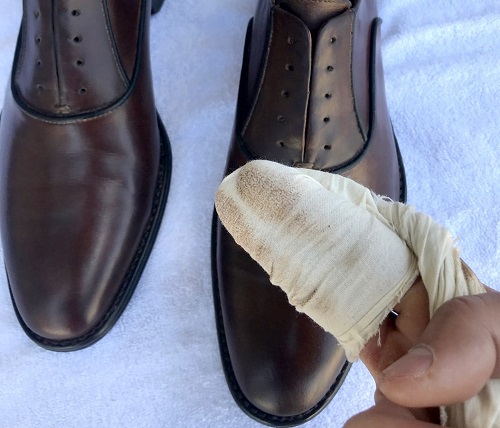
Third, we take the cotton cloth and wrap it around our fingers, then give it 1-2 sprays of water from approximately 4-5 inches distance. Just enough water to make the cloth damp, but not wet.
Take the cotton cloth and wipe down the whole surface of the shoe. The cloth will pick up old, excess polish left-over from the last routine, or any remaining dirt. It will also help prepare the leather to accept the new layer of cream polish we’re about to give it.
Step 2 – Applying the Cream Polish
This step requires the selected color of cream polish, and either a clean cotton cloth, or your fingertips.
The Japanese have spearheaded a major trend in polishing with your fingertips (see the last two World Championships of Shoe Shining). This technique allows for finer-touch application. You can actually feel the polish enter the pores of the shoe, and you warm it up with skin-on-leather contact. But there are both pros and cons to using your finger tips.
Pros and Cons of Fingertip vs. Cloth application
Pros of using your fingertips for application: you can get a finer-tuned feel for putting the polish on the leather. There’s also less excess polish used (so less wasted product). And you can move along contoured areas easier. Finally, the skin-on-leather contact warms up both the polish and the leather, allowing for a smoother application.
Cons of using your fingertips for application: fingers aren’t as absorptive as cloth, so you sometimes grab a larger quantity of polish than intended. Plus you get polish and pigment on your fingertips and under your nails. So your fingers need a thorough washing afterwards.
Pros of using cloth for application: using the thin edges of the cloth you can access the seams and clean the welting better. It’s also easier to apply the cream across broguing or a toe medallion, without accidentally “pushing” too much polish into the holes.
Cons of using a cloth for application: over consumption of product. Sometimes the cloth slips and you smear the polish. And you can also get “linting”, where small cloth fibers come off the cloth and embed themselves in the polish.
Note: I only recommend using your fingertips if you are using an all-natural, non-toxic polish like Pure Polish. Otherwise, you may be absorbing petroleum distillates or chemical dyes through your skin.
How to apply the cream polish
For this example, I used my fingertips to apply the cream polish. Using circular motions, apply a thin layer of cream polish across the entire upper of the shoe. Circular motions ensure it gets absorbed into the grain of the leather, without creating streaking or uneven layers. The pigment in the cream will also quickly cover the blemishes, without “painting” a layer on top.
After putting a full single layer on one shoe, set it down, and do the same for the second shoe, while the first absorbs the oils.
Step 3 – Brush, Wipe, Brush
This step requires a short horse hair brush (or boar’s hair), a long horse hair brush, and a dry, clean cotton cloth.
When you’ve finished applying cream to both shoes, take your short horse hair brush and do a quick brushing around the whole shoe. You want to have forward and backward strokes, up and down strokes, side-to-side, all across. Using about 40% down-pressure and 60% through-pressure. Your goal is to press the polish into the pores of the leather, while also heating up and melting the waxes, ensuring they are spread evenly across the surface.
After a quick brushing across both shoes (perhaps 30-45 seconds each shoe), take a dry, clean cotton cloth and very lightly wipe off any excess cream polish. Use a clean area of the cloth for each shoe. Think of the cream polish like sunscreen or face lotion. You don’t want there to be excess floating on the top. Anything extra will only attract additional dirt, grime, and dust.
The second round of brushing …
After you’ve wiped off the excess polish, take your long horse hair brush and begin long strokes across the whole shoe You want to use approximately 30% down-pressure and 70% through pressure, easing off on the down-pressure as you move across the shoe. This will bring out the natural glow of the waxes, while also ensuring an even spread of all the oils across the entire shoe.
Spend approximately one minute brushing each shoe. And keep an eye out for trapped dust particles, stray horse hairs, or anything that needs to be removed.
If you need to touch up any areas (after removing a stray horse hair, for example), you can repeat the thin application of cream polish, short brush, wipe, long brush process.
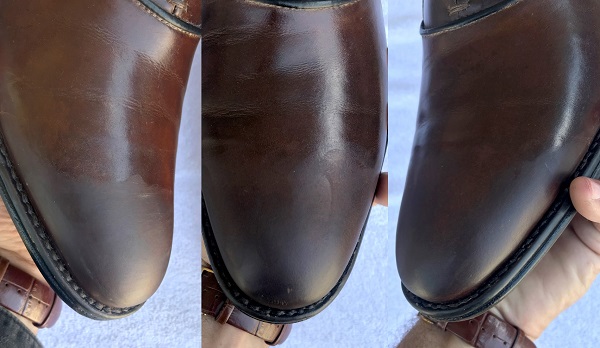
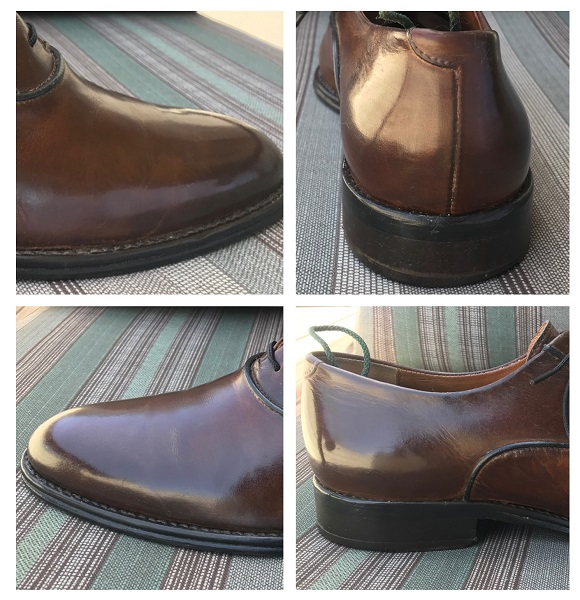
By now, the color should be restored, and you should be seeing a warm glow from the leather. You should also see a revitalization of some of the creased and scuffed areas.
Step 4 – Paste Polish
This step requires your selected color of paste polish, and either a clean cotton cloth, or your fingertips.
For paste polish, you again have color options. Typically it’s safe to stick with the same color as the cream polish or one shade darker. Unless you’re an experienced patina artist trying to develop intentional color variations, staying within one-shade of your original color will keep your shoes looking natural and classy.
I chose to go with Pure Polish Dark Brown Paste Polish, as it is slightly darker, and can allow for a natural gradient from the upper section of the shoe towards the bottom.
It’s very important to remember that you will only be adding paste polish to the toes and heels of your shoe! You don’t want to apply it on the flexing areas. Paste polish may feel like it only has a little stiffer consistency than the cream polish. But when it dries the effect is significantly different.
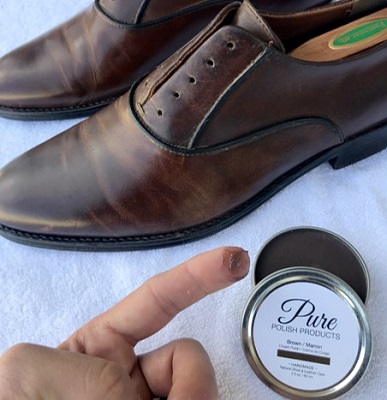
Applying the paste polish
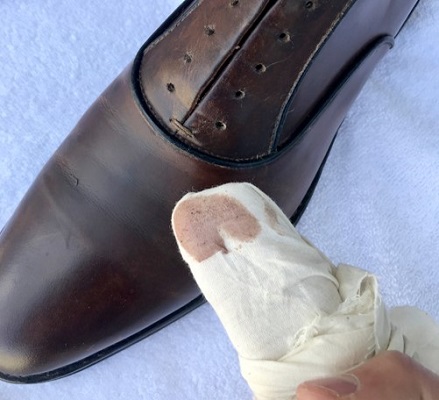
I almost exclusively use my fingertips for applying paste polish. It allows me to add a very thin layer to the leather without worrying about the stickiness of the stiffer waxes embedding fiber from the cloth in the wax layer or smearing it on too thick.
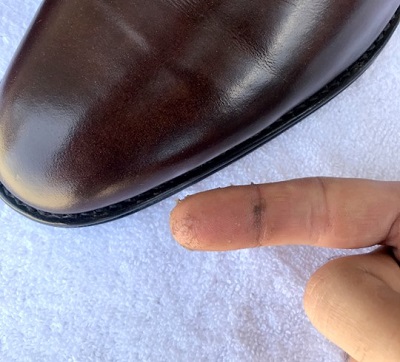
As you can see, I only use a very small amount of the paste polish to apply a whole layer to the toe.
Given I’m using very thin layers, I recommend applying paste polish in vertical and horizontal stripes, alternating back and forth across the area you want to cover. One fingertip application like in the picture above gets “striped” across the leather. Then I rub it across fore-and-back, side-to-side, 4-6 times each, until it begins to harden and shine.
An example I like to use for this process is to imagine you’re creating a delicate “candy shell” on top of the leather.
Once you’ve completed the toe areas, turn the shoe around and follow the same process to apply the paste polish to the heel quarters.
If the shoes are looking a little “streaky” from the vertical and horizontal application stripes, you can use your long horse hair brush to even it out and help smooth the wax. If you don’t notice any stripes, go ahead and begin your second layer. Follow exactly the same process, with very thin layers, and you will soon start to notice the wax hardening and shining.
After you’ve applied two layers, brush the toe and heel areas if you see any streaks. Or just allow the shoes to sit for a few minutes to let the solvent evaporate. You will notice an increased shine on the toes and heels. Those areas will also feel a little bit stiffer to your fingertips than the rest of the leather areas.
Step 5 – The Finishing Touches and Extras
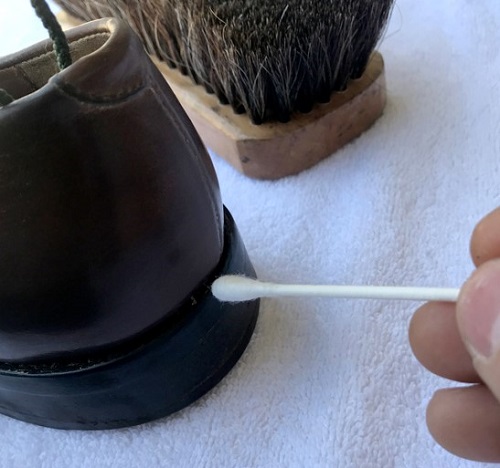
This step can use an assortment of tools, depending on the type of shoe or what you want to do. I recommend at least a keen-eye for detail, and a Q-tip.
Go over the entire shoe and clean up any left-over wax from the welting with a Q-tip or tooth pick. If your shoe has broguing or a medallion, you’ll probably want to get the excess wax out of the holes.
Step 6 – Extras
The little touches at the end of the process can make a big difference to the final result. For example, if your laces are looking frayed, put in some ones. Few things diminish the look of a freshly polished pair of shoes like old, beat-up laces. Likewise, if your sole edges are looking scuffed, you can add edge dressing or Edge Kote.
And If you want a top-notch high shine, a “mirror shine”, there is a whole series of steps on-top of what you’ve done here to get you to that extra level. That’s beyond the scope of this article on routine care. But rest assured these steps are a necessary prerequisite!
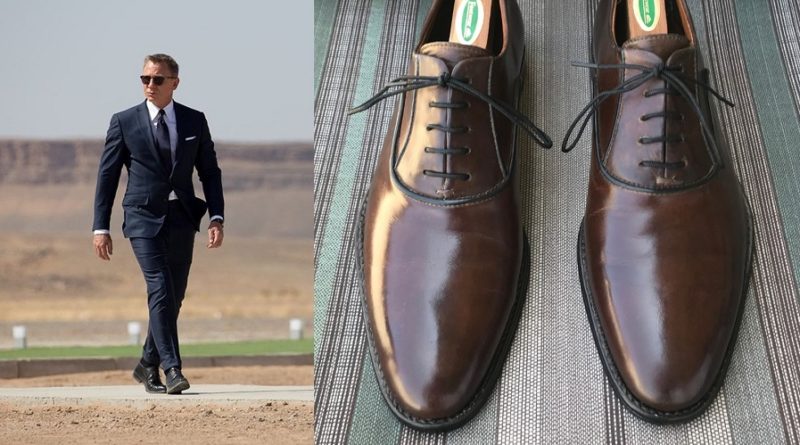
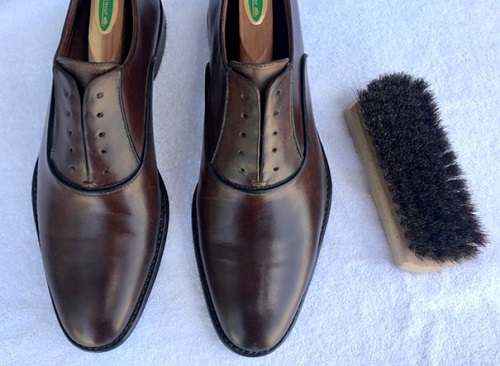
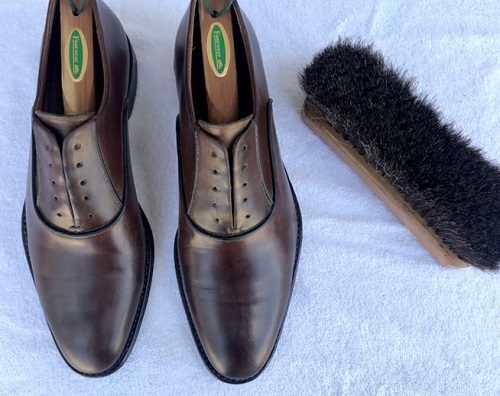
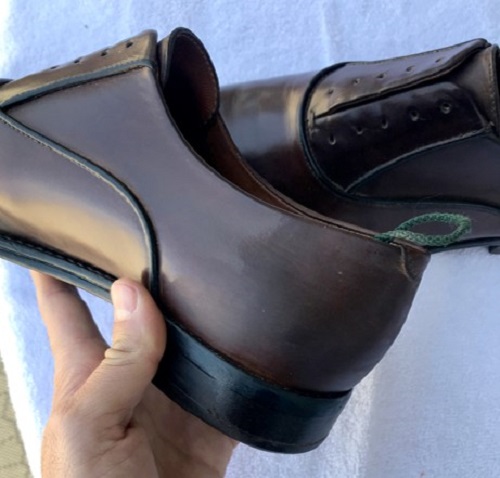
The Final Result
Here is a side-by-side comparison of where the shoes started and how they look now that we’ve finished the process.

I hope you’ve found our Complete Shoe Care Guide useful and that it helps add years to the life of your favorite footwear. Thank you, and shine on!
This is a non-sponsored post. Neither Iconic Alternative nor the author were remunerated in any way for the mention of the products in this post. Honestly, I just really like taking care of my shoes. And I use Pure Polish Products, so I can vouch for their quality and effectiveness. So when I decided to put together a shoe care guide, I immediately thought of Andy and he was kind enough to say yes!